

Wow! You all really liked the chair covers! I received more questions about this project than almost any other! Thanks for all the comments and emails, I read every one! For those of you that loved this, yYou should also see what Marian with Miss Mustard Seed did with a grain sack, it's a very inspiring post and you will love it more than mine!
Okay, most of the questions you had pertained to the application of the letters on the back of the chair cover.
So, here goes...

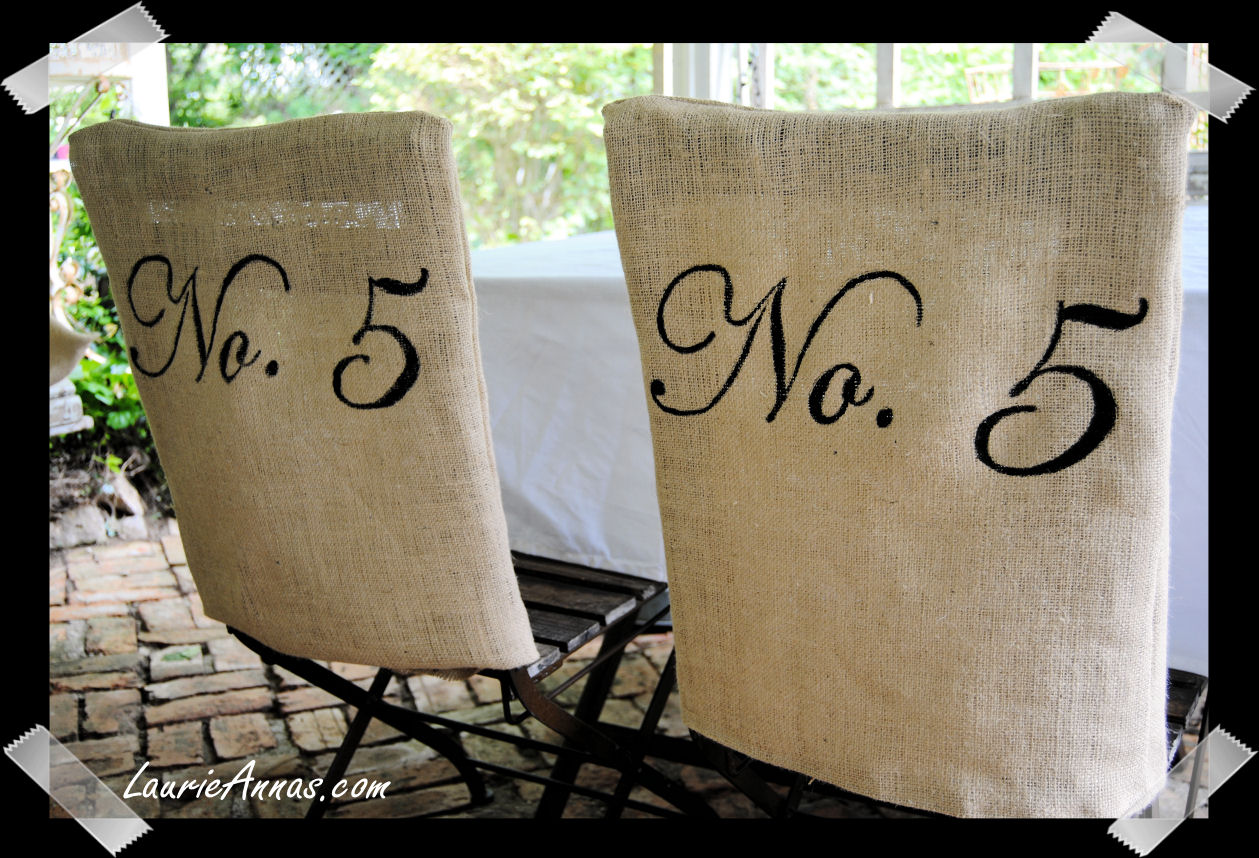
I was unable to find any stencils that achieved the look I wanted, so, I designed my own using Microsoft Word. I typed out the phrase and then searched through the fonts until I found one that I liked. Next, I enlarged the font until it was a size proportionate for the chair back. My font size ended up being somewhere around 600, oh my!

When I was pleased with the pattern, I printed it out on card-stock (regular paper is not thick enough for a good stencil). Next, I carefully cut out the letters and then taped the pages together (my pattern was two pages wide). Poof, I had created my own custom template.

Then I positioned it onto the burlap and taped it into place. Once in place, I took a black ink pen and traced the words onto the burlap and then removed the stencil. Last, I inserted a piece of cardboard inside of the chair cover so my paint wouldn't bleed through to the other side and then painted inside of the traced lines (using an artist's paint brush) just like a coloring book. Let it dry and you are finished!
Some of you also questioned about the type of paint. I used plain 'ol Folk Art acrylic paint that I found at Walmart. For two reasons: 1) our local Walmart doesn't carry fabric paint, 2) fabric paint didn't matter because you can't wash loose weave burlap with destroying the chair cover anyway. But, if you are using a washable fabric for your own project, I would recommend using fabric paint so you can launder it, just remember to pre-wash before you begin the project.
So, there you have it...my "make-do with what you have", "create what you can't find", "figure it out as you go" instructions.
I'm almost embarrassed.............................almost!

P.S. If you create any of your own, link back to this post so I can seek and find!
20 comments:
Love these chair covers. And you did a superb job making your own stencil.
Thanks for the tut!
Hugs
SueAnn
Totally divine chair covers! I love their simple elegance.
Making do is, more often than not, the best way to achieve that unique, personal look we all desire. My cottage is filled, inside and out, with make-do with what you have ideas.
Another beautiful project, LaurieAnna.
Liz @ the Brambleberry Cottage
Thanks for sharing! These are so cool! Theresa
Enjoyed this post... I have a grain sack bug right now also... I have been salvaging some and using them in different ways... Enjoy your day.
those covers are truly adorable and I need to make some for my kitchen table! love it.
Thanks for this, Laurie Anna! It sounds easy enough and I hope I can pull it off. I think it would be a nice touch to my dining room for the Summer months {cover up some of that wood}.
As an artist with much paint-stained apparel, I gotta say: Plain ol' acrylic does not appear to wash out of anything, EVER. Someday all that is left of our society will be the Hoover Dam, and acrylic paint...
So I think you're safe with the Folk Art (not a Wal-Mart specific brand, by the way!).:P
how cute
I stumbled across your blog and wanted to say hi.
Take a minute an check my blog out
I have lots of great giveaways going on.
Thanks :)
ethertonphotography.blogspot.com
Thanks so much for stopping by and your sweet comment!
I love these burlap chair covers. I am actually working on some burlap pillows right now that I am painting something on them as well. I can't wait to be done! :o) Yours are GREAT!
Embarrassed, no!! Love them, can think of so many uses, thanks for sharing the how to of your stenciling!
Tracey
LaurieAnna~ I feel better now,I just knew you freehanded that. I've
done the same thing and that is what paint I used too. You could
wash it but you will have a very
limp chair cover.LOL...Thanks for
sharing,you did an excellent job.:O)
I am so in love with these chair covers. Thanks for the tutorial.
Wonderful! Thank you for sharing how you made them.
awesome, awesome!
becky
What a great post! I immediately added your blog to my Crafty Bloggers List so I can visit often. Also, I went back to see if you sold items, and I wasn't surprised to find such a gorgeous boutique. I am adding your button to my blog so that you get more shoppers. Please come and check my boutique out and do the same to promote one another. Please consider looking at the post on my blog for Shabby Lane Shops ~ An online mall that your boutique would do well in. Tell Miss Catherine I sent you over!
gorgeous...you are too talented!!!
These are so gorgeous! They look like something out of a french country boutique. You have such imagination No. 5 after Chanel? Or does the number 5 have significant meaning to you?
I love your tag at the end, what a great motto to live by. I oddly enjoy learning as I go, unlike most. And making do with what we have is such a money saver, and make a project a bit more special.
I love these--aren't burlap and numbers the best!
I love your chair covers. The numbers are my favorite!! Love & blessings from NC!
The mixing old and new elements, your custom work are amazing pal! And they are unique! Your aesthetic sense is very lively and soothing. The bathroom oh! What a fantastic idea!
Enjoyed this post...I love these burlap chair covers. Thanks for sharing this
Thanks
Post a Comment